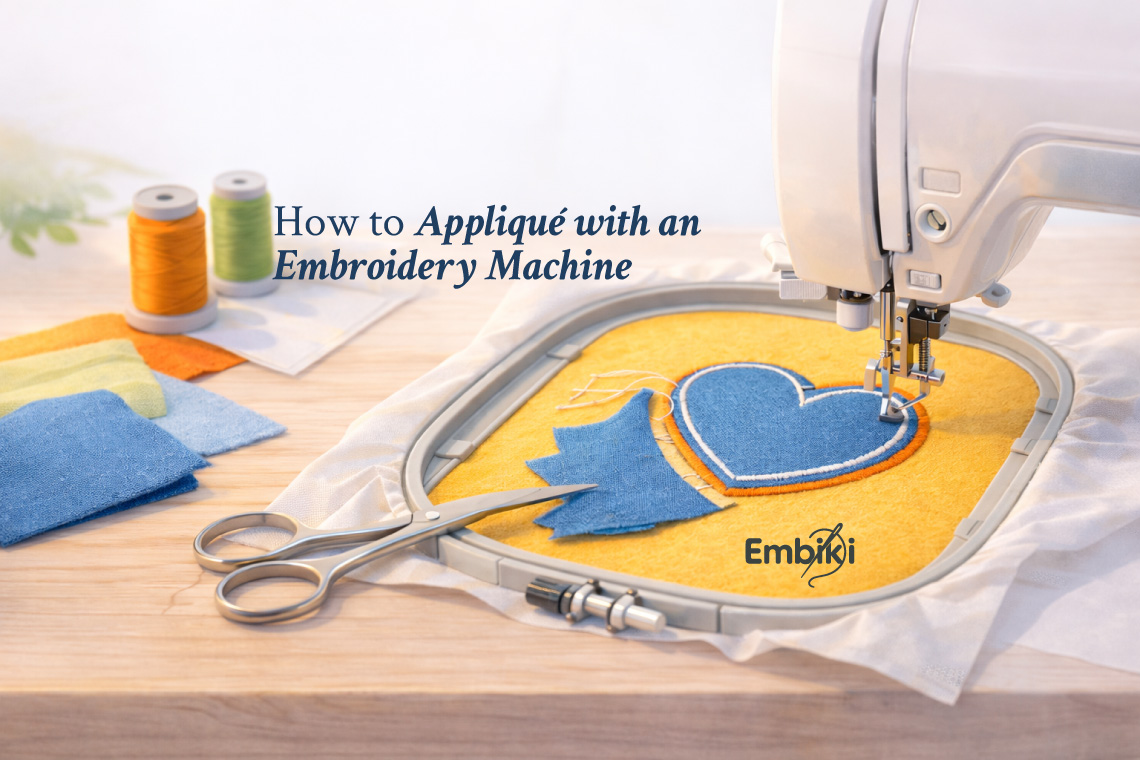
Appliqué is one of the most creative and fabric-saving techniques you can use in machine embroidery. If you’ve ever wondered how to create bold, layered designs with less stitch density and more texture, learning appliqué with embroidery machine techniques is the perfect next step.
This beginner-friendly guide walks you through the full embroidery appliqué tutorial, including tools, stabilizers, fabric prep, and professional machine appliqué tips to ensure clean results every time.
What Is Machine Appliqué?
Appliqué is a technique where fabric pieces are stitched onto a base fabric using embroidery stitches to secure and decorate the edges. Instead of fully stitching a design with thread alone, appliqué uses fabric as part of the design.
Benefits include:
-
Reduced stitch count
-
Faster production time
-
Less thread usage
-
Unique textured look
-
Softer finished garment feel
Machine embroidery makes appliqué precise, repeatable, and ideal for both personal projects and small business production.
Tools You’ll Need
Before starting appliqué with embroidery machine techniques, prepare the following:
-
Embroidery machine
-
Appliqué embroidery design file
-
Base fabric (shirt, tote bag, etc.)
-
Appliqué fabric pieces
-
Stabilizer (cut-away or tear-away depending on fabric)
-
Temporary fabric adhesive spray (optional)
-
Sharp embroidery scissors
-
Iron
Choosing the right stabilizer is critical. For stretchy fabrics, use cut-away stabilizer. For woven cottons or structured materials, tear-away often works well.
Step-by-Step: How to Appliqué with an Embroidery Machine
Step 1: Hoop Your Base Fabric
Hoop the base fabric with the appropriate stabilizer. Make sure the fabric is smooth and tightly secured without stretching.
Wrinkles or loose hooping can cause alignment issues during appliqué stitching.
Step 2: Stitch the Placement Line
Load your appliqué embroidery design into your machine.
The first stitch is typically the placement line, which outlines exactly where the appliqué fabric will sit.
Do not skip this step—it ensures perfect positioning.
Step 3: Lay Down Appliqué Fabric
Place your appliqué fabric over the stitched placement line.
You can:
-
Use temporary adhesive spray
-
Lightly tape the edges outside stitch area
-
Hold it manually for small designs
Make sure the fabric fully covers the placement outline.
Step 4: Stitch the Tack-Down Line
The machine will stitch a second outline called the tack-down stitch, securing the appliqué fabric to the base material.
Once complete, remove the hoop from the machine (do not unhoop the fabric).
Step 5: Trim Excess Fabric
Using sharp embroidery scissors, carefully trim the excess fabric as close to the tack-down stitch as possible.
Precision here determines how clean your final edge will look.
Professional machine appliqué tip: Use curved appliqué scissors for tight corners and clean curves.
Step 6: Final Satin or Decorative Stitch
Return the hoop to the machine.
The final stitch will:
-
Cover the trimmed edges
-
Secure fabric permanently
-
Add decorative finishing (often satin stitch or zigzag)
Once finished, remove from hoop and trim stabilizer.
Machine Appliqué Tips for Professional Results
To elevate your embroidery appliqué tutorial results, keep these expert tips in mind:
1. Pre-Wash Fabrics
Prevent shrinkage after stitching by pre-washing both base and appliqué fabrics.
2. Match Thread to Fabric Tone
A slightly darker thread than the appliqué fabric often gives better definition.
3. Watch Stitch Density
If your satin stitch looks bulky, adjust density settings in your embroidery software.
4. Test First
Always test your design on scrap fabric before stitching on finished garments.
5. Choose the Right Fabric Types
Cotton, felt, denim, and twill work beautifully for appliqué. Very thin or stretchy fabrics require extra stabilization.
For a deeper breakdown of compatible materials, see our guide on best fabric for embroidery.
Common Appliqué Mistakes to Avoid
-
Skipping stabilizer
-
Not trimming closely enough
-
Using dull scissors
-
Misaligning hoop placement
-
Choosing overly complex designs as a beginner
Avoiding these mistakes ensures smoother learning and cleaner results.
Is Appliqué Good for Beginners?
Yes. In fact, appliqué is often easier than full dense-fill embroidery because:
-
It uses fewer stitches
-
Takes less time
-
Allows more room for creativity
For beginners, it’s a great way to understand stitch sequencing and machine operation.
Best Projects for Machine Appliqué
Appliqué works especially well for:
-
Baby name onesies
-
Monogram towels
-
Tote bags
-
Seasonal decorations
-
Children’s clothing
-
Quilting accents
It’s also popular in small embroidery businesses because it reduces production time while maintaining high visual impact.
If you’re exploring monetization, read our guide on selling embroidery designs online to understand the pros, cons, and profitability factors.
For those planning to build a home-based embroidery brand, see our roadmap to start embroidery business from home.
Final Thoughts
Learning how to appliqué with embroidery machine techniques opens up endless creative possibilities. It combines fabric layering with precise machine stitching to create bold, professional-looking results with less thread density.
Whether you’re a beginner exploring embroidery basics or an experienced creator expanding your skills, mastering appliqué adds value to your creative toolkit.
Practice, test, refine—and you’ll quickly gain confidence.
Frequently Asked Questions
What stabilizer should I use for machine appliqué?
Cut-away stabilizer works best for stretchy fabrics. Tear-away is suitable for stable woven materials.
Can I use regular fabric for appliqué?
Yes, but cotton, felt, and twill are easiest to work with, especially for beginners.
Why does my appliqué fabric fray?
Fraying usually happens when trimming isn’t close enough to the tack-down stitch or when using loosely woven fabrics.
Is appliqué faster than regular embroidery?
Yes. Because part of the design uses fabric instead of dense stitching, it reduces stitch count and production time.
Do I need special embroidery designs for appliqué?
Yes. Appliqué requires designs specifically digitized with placement, tack-down, and finishing stitch steps.


